If your hard drive is beginning to fail, you may notice some telltale signs, such as strange noises, error messages, or corrupted files. Hard drives have a lifespan of four to six years, and they can suffer from physical damage, mechanical failure, data corruption, and more.
You can troubleshoot certain issues, but others require professional help. If you’re having trouble accessing important data, contacting hard drive recovery professionals is your best chance for getting that data back.
If you know your hard drive was physically damaged, do not attempt to power it on or troubleshoot your hard drive problems. Instead, seek professional data recovery services to ensure you get expert assistance in a clean room environment.
This post introduces the warning signs of hard drive failure and offers troubleshooting steps so you can get back to using your device.
Hard Drive Failure Causes and Signs
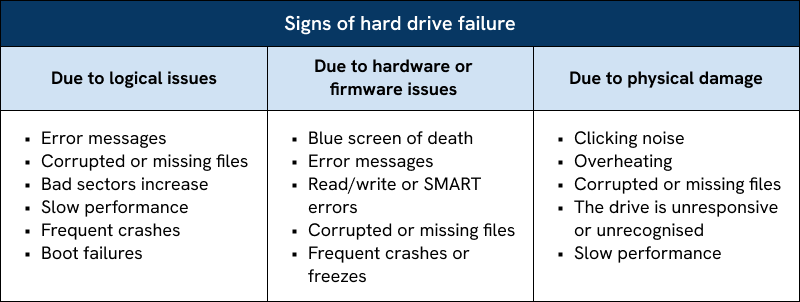
HDD failure can occur for several reasons, be it logical, software, hardware, or physical issues. Because the symptoms of each can overlap, if you aren’t certain what the issue is, seek professional data recovery help to avoid impacting your data.
Logical issues can occur from
Hardware or firmware issues can occur from
Physical damage can occur from
Common signs of hard drive failure include corrupted files, slow performance, frequent crashes and freezes, unusual noises, and general unresponsiveness.
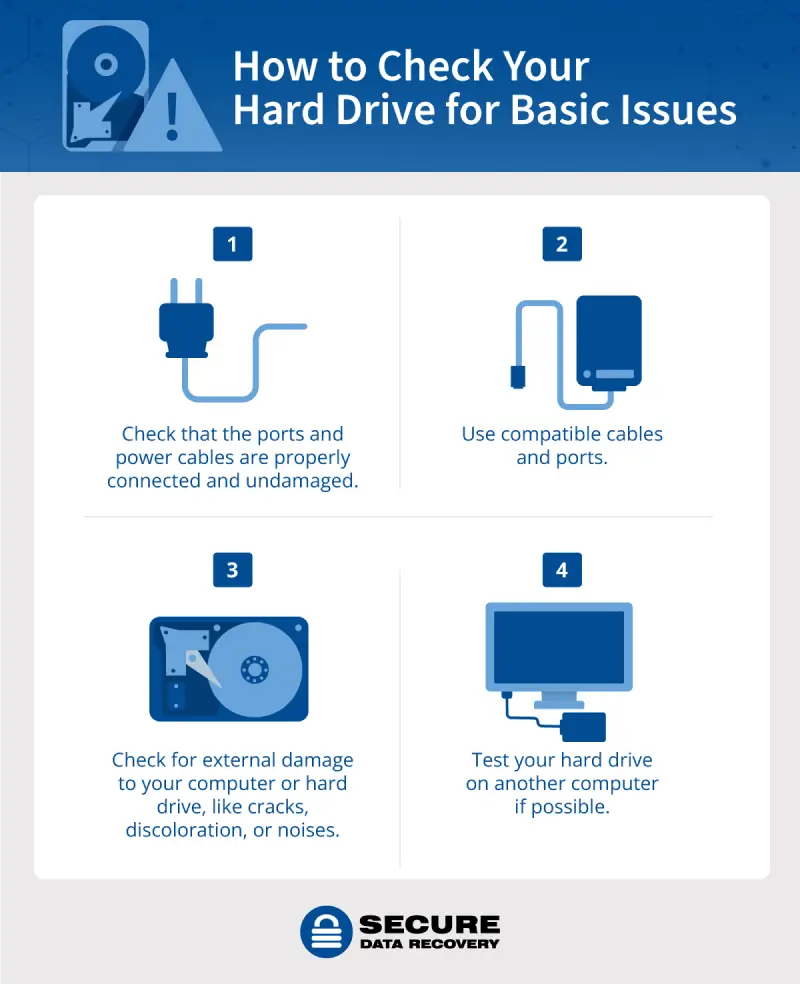
First, Assess Your Hard Drive for Basic Issues
Just because your hard drive isn’t working doesn’t necessarily mean it’s about to fail. Sometimes the simplest things can create an issue. Before you dive into more advanced troubleshooting options, check for the basics.
If your hard drive is not healthy and still malfunctions, it might be failing or about to fail. Try to back up all your data and follow the steps below to troubleshoot the signs of hard drive failure.
How to Troubleshoot Your Hard Drive
If you’re experiencing any of the signs above but your drive has not been physically damaged, you can follow the troubleshooting steps for the issue impacting you. You should never use or try to troubleshoot physically damaged hard drives to give yourself the best chance to recover your data.
Check for Errors Using Disk Utility or CHKDSK
Here are some ways you can troubleshoot hardware or software issues that result in a corrupted hard drive or missing files, SMART (self-monitoring, analysis, and reporting technology) errors, error messages, or frequent crashes.
For a Mac:
To check and see if your Mac disk is about to fail, follow these steps:
You can run First Aid from Disk Utility:
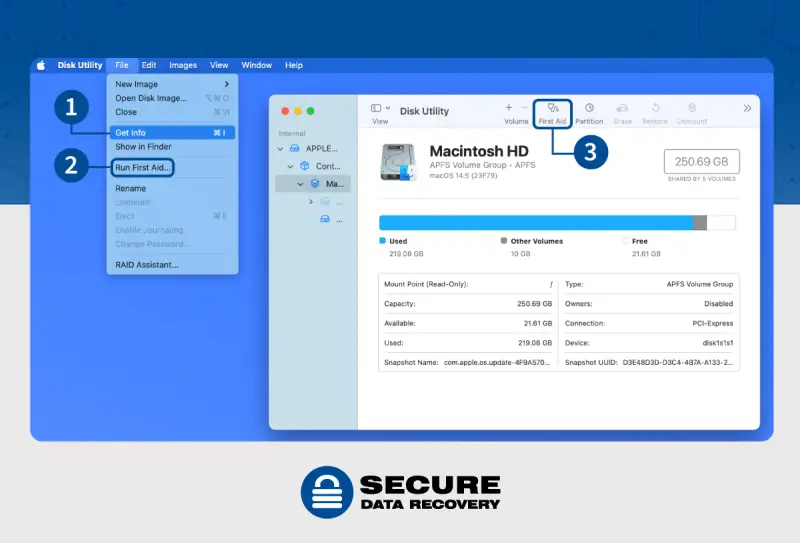
- Click the First Aid button.
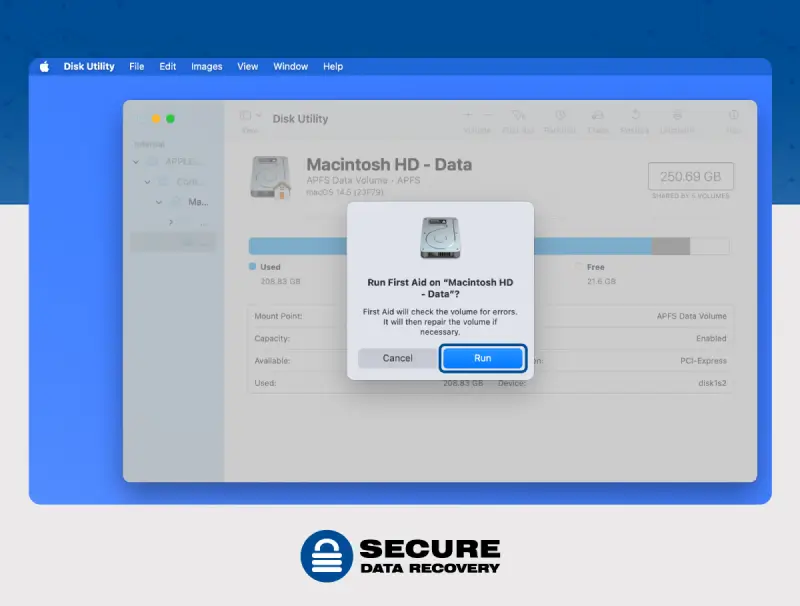
- Simply click Run and follow the instructions for each volume on your device
- You can repeat the process for each storage device.
- Restart your computer.
First Aid attempts to repair your disk. If First Aid fails, you may need to reformat the hard drive which will erase all your data. Before you do that, contact our expert hard drive recovery specialists to see if your data is salvageable.
For a PC:
If you use a PC, regardless of operating system, you can check the health of your drive with these quick steps:
You can also run a diagnostic tool, such as CrystalDiskInfo to get more information about your hard drive.
If the drive isn’t healthy, try using CHKDSK to scan and repair hard drive issues including event ID errors and bad sectors. You will need to be careful using CHKDSK, as incorrect usage could cause you to overwrite or lose your data. Here are the steps to complete CHKDSK:
- Close all files, then click the start button and type “cmd” to navigate to the Command Prompt.
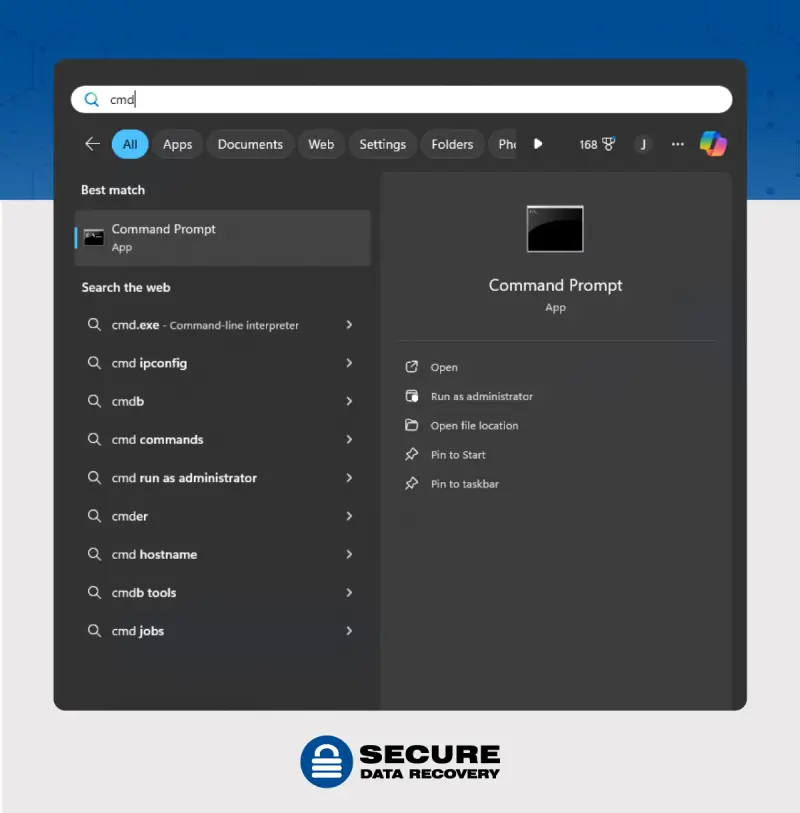
- Click the command prompt and select run as administrator.
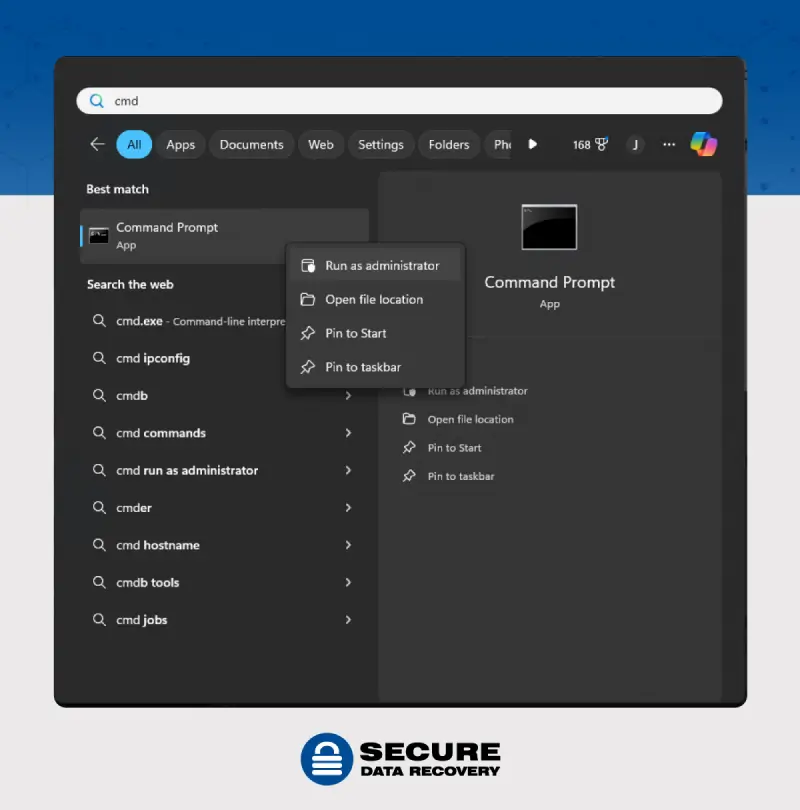
- Enter “chkdsk X:/r” but replace X with the drive letter. This command attempts to fix errors on the hard drive.
If there is an error running CHKDSK, error messages will display. Once CHKDSK finishes running, it will share the status of the disk. A 0 means that no errors were found and a 1 means that errors were found and fixed.
Update the Operating System and Drivers
If your hard drive is malfunctioning due to software issues, updating the operating system and drivers can help. New software may fix compatibility issues that cause error messages and malfunctions.
For a Mac:
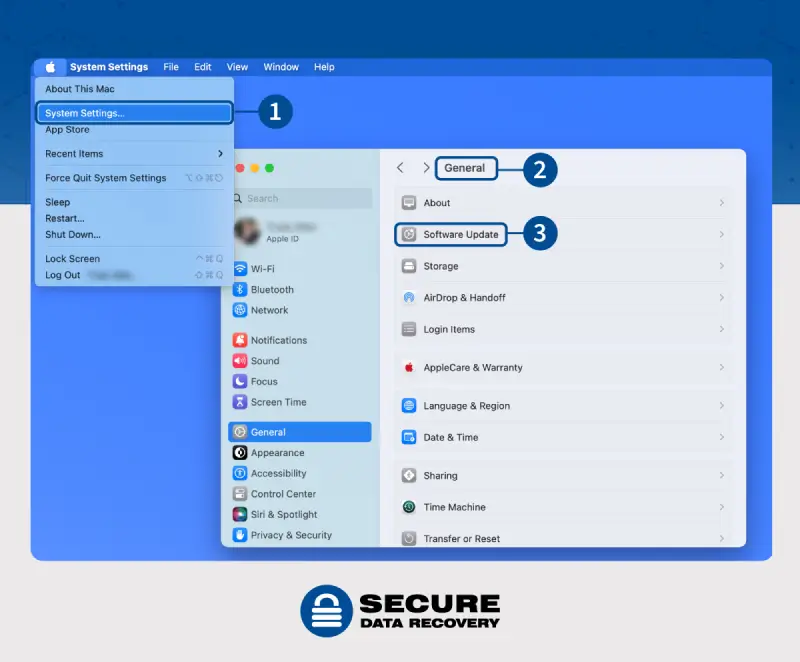
- Click the Apple in the top left corner of your computer. Navigate to System Settings > General > Software Update.
For a PC:
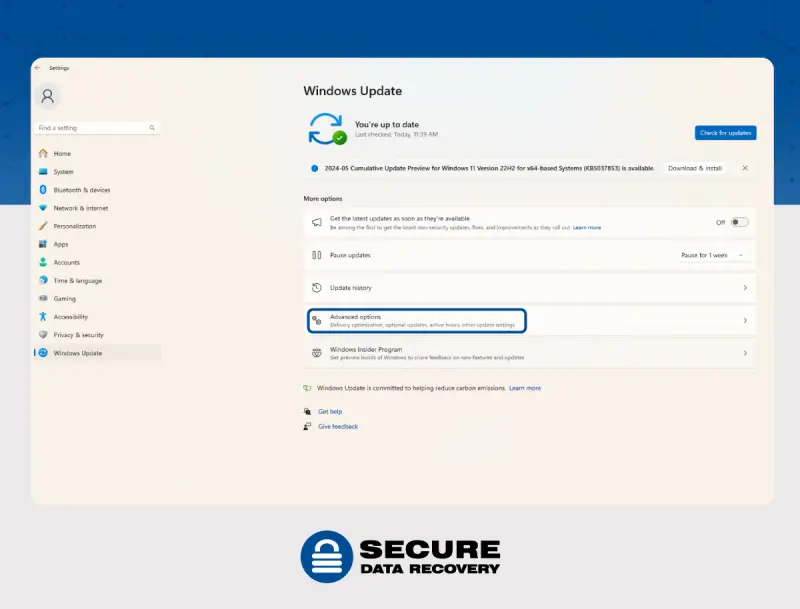
- Navigate to Settings and then select Windows Update. From here you can allow Windows to search for and begin any necessary updates, including BIOS updates.
- From Windows Update, you can also click Advanced Options. Here you’ll find additional updates helpful to your drivers and settings.
- Review and make available updates.
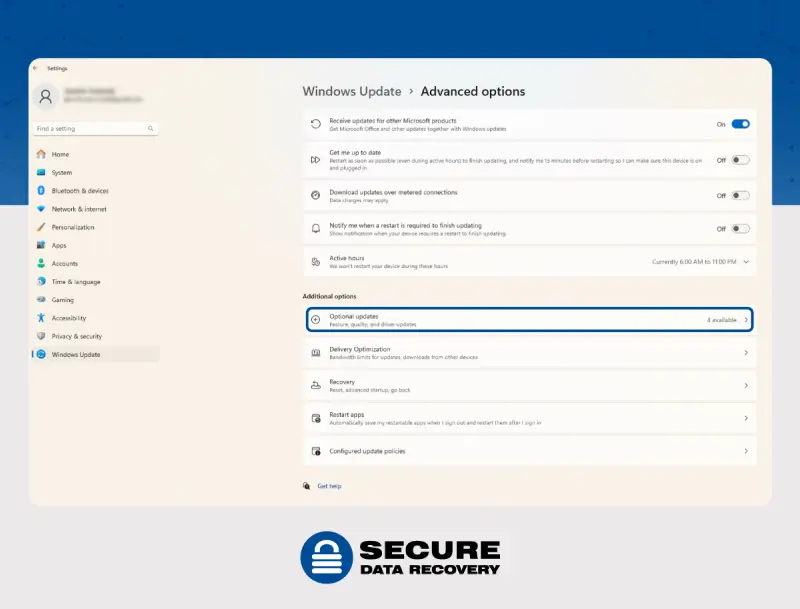
- After updating, restart your computer or remove the external hard drive and put it back in.
If that doesn’t work, you will need to talk to a professional data recovery specialist.
Scan for Malware
If you’re afraid that malware is causing the issue, you can scan the hard drive with tools like Malwarebytes. You’ll need to run this scan in safe mode on your Mac or PC to be sure your drive is healthy.
For a Mac
There are two types of Macs, intel-based and chip-based. Select the Apple logo in the upper left corner, click About This Mac, and then check processor type to see which Mac you have.
If you have an intel-based Mac:
If you use a chip-based Mac:
For a PC
You can boot in safe mode from the sign-in screen by following these steps:
Check System Permissions
Continual read and write errors are a sign of hard disk failure. However, read/write failures can also be due to permission issues. Running Disk Utility on a Mac should identify permissions issues.
For a PC
If you’re experiencing read/write head errors on your PC, it could be that you need to set certain permissions on your hard drive.
Boot in Safe Mode
If your screen is blank or you experience a black screen or blue screen of death (BSOD) you can try to troubleshoot in Safe Mode. Error codes on Windows will help you determine what the issue is. The NTFS_FILE_SYSTEM error typically indicates that there is an issue with your hard drive.
For a Mac:
Begin by restarting your device in safe mode, following these steps:
If you have an intel-based Mac:
If you have a chip-based Mac:
For a PC:
To restart your PC in safe mode, follow these steps:
How to Reduce the Chance of Hard Drive Failure
If you’re worried that you might have a failing hard drive or if you’re worried about potential data loss in the future, here are some steps you can take to reduce your chances of hard drive failure and data loss.
Regular Software Updates
Keeping your operating system up-to-date helps prevent software-related issues that could impact hard drive performance. The steps are outlined below for software updates for both Mac and PC users.
For a Mac
You can update software on your Mac by going into your General Settings and selecting the Software Update tab. If the software is downloaded from the App Store, you can toggle to the Apple Menu and choose the updates needed, which will show next to the App Store icon.
You can even make your Mac update automatically. You simply go to General Settings and choose the Software Update tab, then click the info button. You will see several options that will allow you to check for updates automatically or download updates without asking.
For a PC
Windows 10 and 11 will update for you automatically once the updates are released. To check what updates have been released, select Settings and go to your Windows Update section. All necessary updates are located in this section, and we cover this in the first troubleshooting section above. Windows updates will not affect your external hard drive, giving you peace of mind as your PC automatically updates.
Back Up Your Hard Drive
Another way to keep your hard drive healthy and prevent data loss is by performing regular backups of your hard drive. The steps for backup are listed below for both Macs and PCs.
For a Mac
The best way to back up your Mac is to set up a storage device as your backup disk. Follow these steps:
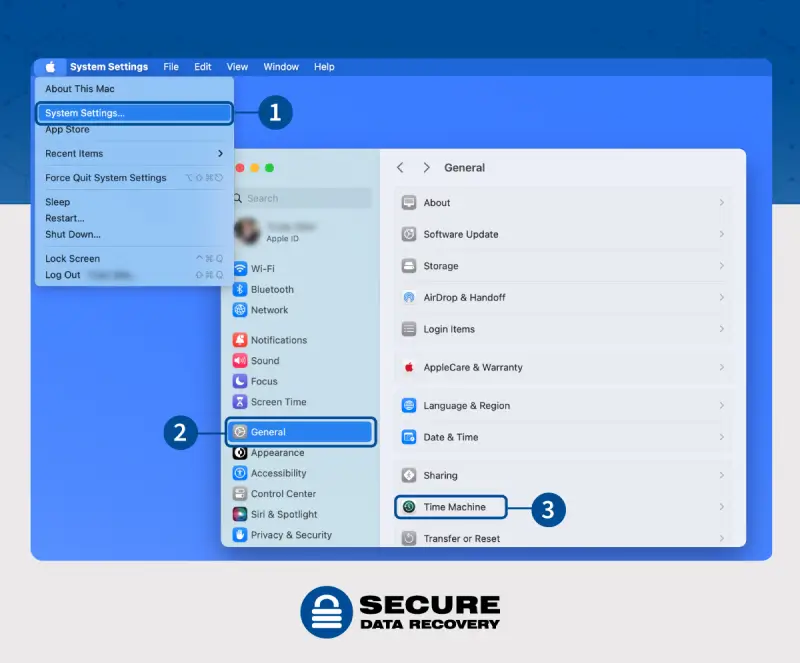
- Go to General Settings, then click Time Machine.
- You can click Add Back-up Disk or simply the + button.
- Then, you can set up your storage device by connecting it to your Mac and clicking Set Up Disk to begin the process.
- You can also back up immediately by going to the Time Machine tab and then clicking Back Up Now. Or, you can choose to wait for an automatic backup.
For a PC
To back up files on your PC, you will want to use your file history. You can do this by clicking Start > Settings > Update & Security > Backup > Add a Drive. The Add a Drive tab allows you to choose another network location or external drive to save your files to. You can also use File History to restore a file that you lost. All you need to do is click on Restore your files with File History, then find the version of the file you need and save it in the location it used to be in.
Safely Eject and Handle the Hard Drive
Another easy way to preserve your hard drive is by safely ejecting and handling your hard drive. By being careful, you can avoid data loss or corruption. Follow the steps below for handling either a PC or Mac hard drive.
For a Mac
On your Mac, choose one of two ways:
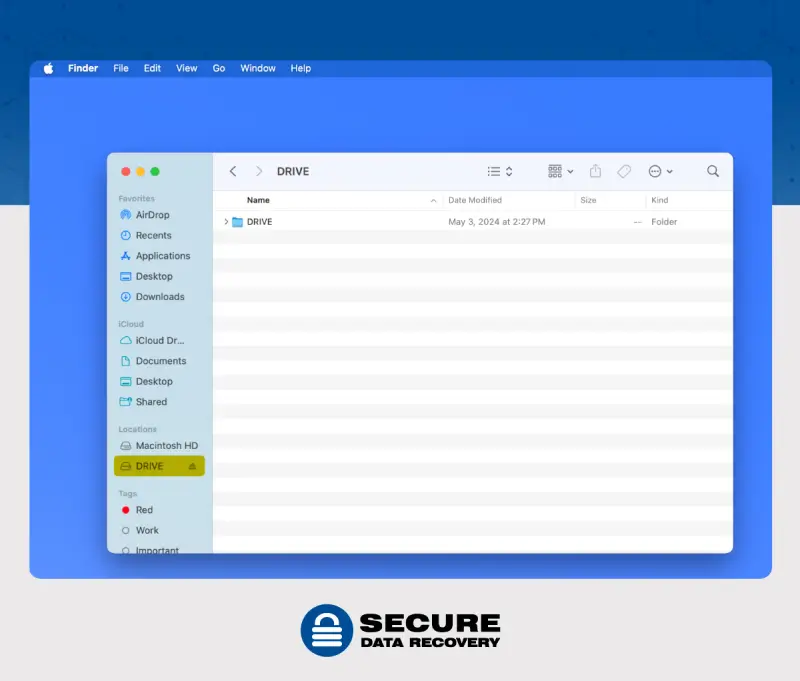
- Find and select what needs to be ejected, then click File>Eject.
- You can also eject a drive through the Finder sidebar by clicking the button labelled “Eject” next to the file you need. Once the drive is ejected, you can take it out.
For a PC
On your PC, you can utilise the Safely Remove Hardware button. By navigating to Windows Explorer, you can select the Safely Remove Hardware and Eject Media button. Click the three vertical dots and select Remove Device. You can then carefully grab your hard drive.
Check Your Hard Drive’s Health
You can also keep yourself updated on your hard drive’s health, which will allow you to see if your hard drive is beginning to fail. See the earlier sections to check the various ways to evaluate your hard drive’s health. For instance, on your Mac, you can do this through Disk Utility. For your PC, you can run diskmgmt.msc. Both programs will keep you updated on how your hard drive is doing.
Restore Your Lost Data
If you lost your data or your important data was corrupted thanks to a faulty hard disk drive, you should get help from Secure Data Recovery. When your hard drive is physically damaged, you will want professional help to recover your data. We operate under a “No data, no recovery fee” guarantee. If we can’t recover your data, you don't have to pay any fees.


